Frequently Asked Questions (FAQs) About Custom Designs
Our process adds versatility to the design or image you want to put on our products (like license plates, etc.), because it is capable of reproducing anything from a single-color line art to full color photographs, with breathtaking results.
Copyright
Copyrights and licenses for the images and/or logos you want us to use for the custom products are your responsibility.
How to send us the image/design.
There are two ways you can send us your design.
- The Printed Form. This way, you send us the image/design itself, via postal mail, from which we will make up your custom order. Things to note about this method:
- This method takes longer as it depends largely on the speed of the mail service.
- The design has to be properly packed to prevent from damage during transit.
- If possible, send us a good copy of the design rather than original.
- Also indicate if you would like the design sent back along with your order.
- The Digital Form. This just refers to images saved in the computer file format. We prefer JPG, although TIFF is also acceptable. The two more popular forms of digital images are those that are scanned from the original and those taken by a digital camera. Things to note are as follows:
- This method is faster as you can email the image to us as an attachmnet.
- Our email limitation however, is only 3MB. Hence, our preference for JPG formats as they are smaller files. However, if you can make a copy on a CD, you can send that to us via the postal mail.
Where to send your images/designs/photos and instructions.
You can send your images/designs/photos via postal mail or by email. Click here for our contact information.
Other things to note regarding your image/design. The quality of the image on the end product is very dependent on many factors. However, the most important one relies on the quality of the image that is sent to us.
On the printed form, if the design is blurry like a picture that's out of focus, for instance, that lack of sharpness will be duplicated on the end product. Also, marks and creases and folds will likely be reproduced as well.
Aside from the required clarity of the image, the appropriate size of the design for its use on the final product should be considered. For example, a 1" x 1" photo will be hard to reproduce on a 6" x 12" license plate, without cutting off half of the image. That is, unless the design looks just as good or better if cropped that drastically.
As a point of reference, in the best case scenario, our process needs a minimum of 1/4 the final size per dimension to reproduce an image well. That is, for a license plate, the design must at least be 1.5" x 3". Needless to say, the bigger the design, like 3" x 6", the better.
Conversely, there is a limit to the physical size where handling starts to become a problem. For instance, our scanner can only handle up to 8.5" x 14" in size. However, when the source design is bigger than what our scanner can handle, like a painting, we resort to our digital camera.
When you scan your image or take a picture using your digital camera, please remember we need a sharp image at a minimum of 300 dots per inch (dpi) at the size of the end product. And that's after you've made all the corrections, enhancements, resizing, adding/removing elements and any other modification you want to make.
View at 100% on your 'Zoom' box, to check on the sharpness of your image.
Minimum requirements for a custom license plates, 12.25" x 6.25" in size at 300 dpi is equivalent to 3675 pixels x 1875 pixels.
Digital images are all about pixels or dots, of color information. They are like cross stitch designs. A 10 x 10 cross stitch pattern will have 100 x's. To enlarge this to 20 x 20, you will need 400 x's or 300 more than the original pattern. What colors do you use to fill these 300 holes that were added when you enlarged this pattern?
Suppose instead you reduce the 10 x 10 pattern to 5 x 5? You will need only 25 x's. Which of the 75 x's out of the 100 do you discard?
Same thing happens to a digital image. Most graphics will allow you to enlarge or reduce an image. They just use different methods or algorithms to interpolate/guess what color goes where. Some are better than most and are probably costlier. But one thing's for sure, the clarity and sharpness of an image is sacrificed whenever enlarging.
Enlarging can be done in one of two ways or both. You can increase the physical size, and/or you can increase the resolution or what they refer to as the image dpi.
Let's say for example that I have a picture that's 4"x 6" that I scanned at 150 dpi. This will give me an image with 600 x 900 pixels of information. Let's say, my original picture was sharp and the scan was accurate and so, this 600 x 900 image is sharp at 4" x 6".
I can resize this image using my graphics program to 8"x 12" without changing the resolution at 150. Now, I will have 1200 x 1800 pixels. Surely, this is a better image file as it now has 4 times more pixels!
Actually, no. The first one is a sharp image at 600 x 900. The second one is a not so sharp image albeit at 1200 x 1800.
Okay, suppose instead of increasing the size, I increase the resolution using my graphics software to 300 dpi? I end up with 1200 x 1800 pixels. So, how is this different from doubling the physical size?
Nothing. In both cases, your image will be somewhat blurred although bigger. The enlarging process added 1.6 million pixels to the original 540,000 that the graphics software had to interpolate.
 |
 |
 |
|
|
|
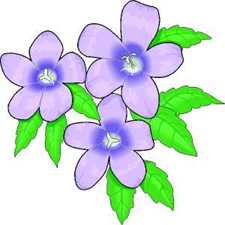
| Note that the 3rd poinsettia, although its size was maintained at 1"x1" after increasing the resolution to 150, looks the same as the second (middle) poinsettia. That's because the computer screen displays at 75 dpi, and simply uses more screen to accomodate more pixels. | ||
In any case, it is not simply a matter of increasing resolution or size (physical or pixel) to get a good image on any of our product. Because these will only blur your image. To reiterate, what you need is the sharp image at the size you need and at the minimum resolution of 150 dpi.
So, what do you do when you have a 4" x 6" picture you want to put on a icense plate? Scan at 300 dpi or higher.
If you want to allow for minor changes or corrections to the image, scan at least at double what your final resolution should be. That way, you can edit the image, then reduce the resolution so your corrections will not be so obvious.
 |
 |
 |
|
|
|
| You will notice that sharpness is relatively easier to maintain when you reduce image size. | ||
Digital Cameras takes pictures in various pixel sizes. You may have heard about 2, 3, 4, 5 or more Megapixels. These refer to the amount picture/color information that is recorded by the camera when you take a picture.
| Table of Minimum Pixel Sizes Required for Photos | ||
| Photo size (in inches) | 150 dpi | Total Pixels Information Required |
| 3 x 5 | 450 x 750 | 337,500 |
| 4 x 6 | 600 x 900 | 540,000 |
| 5 x 7 | 750 x 1050 | 784,500 |
| 8 x 10 | 1200 x 1500 | 1.8 Megapixels |
| 11 x 14 | 1650 x 2100 | 3.5 Megapixels |
Don't forget however, that the more pixels and/or the higher the resolution the better. It is easier to discard information (reduce or crop the image) than to 'guess' (enlarge the image) it, even if it is done by the computer.
Besides, most pictures you take need some cropping. Although your camera takes 4 Megapixel pictures, after cropping, you may end up with only half the pixels.
Because the pixel requirements for good image reproduction is rather high, most pictures taken by low megapixel digital cameras or those taken by your cell phone are too small pixel-wise. They are however, good enough for sharing over the internet. But technology should take care of that 'shortcoming' before long.
Notes on taking pictures. There are a few things that you have to remember when taking pictures of your design or image, whether you're using the traditional or digital camera.
- Be aware of the lighting. Even the faintest of light coming from one window can throw one part of the image into a shadow and another into relatively too much light.
- Use a tripod to avoid camera shake.
The Monitor Vs. The Printer.
The monitor requires only 75 dpi to display an image sharply. If you have higher dpi, the image will only appear bigger on the screen.
A printer requires at least 150 dpi for sharp images and can print up to 1440 dpi or more, in some models.
To print a square inch of picture on the monitor, you need 75 x 75 or 5625 pixels, whereas the same image requires 150 x 150 or 22,500 pixels on paper. That 75 x 75 pixel image will look sharp as a 0.5" x 0.5" paper print.
When you download images from the internet, assuming they are copyright free, they are sharp on the monitor but may probably not be suitable for reproduction on paper. Check to see if they have enough pixel information.
If not, you can try to resize, keeping in mind that the image will be blurred. There are images however, where blurring won't detract too much from it. But we suggest that you view the enlarged image at 100% (or higher) to see how much blurring occured. And then decide if that image is acceptable to you or not. Remember, that's probably how the end product will look like after going through our process.
Colour Matching.
We do not offer exact color matching as there are too many factors we can not control, that affect color information and the way the color spectrum is reflected/displayed.
When you take a picture, the light you use (amber, natural, fluorescent, incandescent, candle) affect the colors. Even the angle at which the light shines on the design have different effects.
When you scan an image, the light used by the scanner affects the colors as well.
Even between different computer monitors (different brands or different models, CRT or LCD), the same colors can look different. This is true also for different printers (different brands, inkjet or laser).
And of course, the medium (like the license plate), will likely have a different reflective property versus wallpaper, photos, cloths, posters, whatever sample you provide us. Other factors include whiteness/brightness, texture of the medium before the ink is applied, etc.
It's like printing on plain paper and photo paper. The type of medium/paper affects the print result.
Most important, chances are, the ink, dye, paint used in your samples are a different formulation than the one we use to make your custom products. This difference almost always translates into a different shade of the same color.
Another thing to remember is that, although computers can reproduce millions of color shades, not all of them can be handled by your printer. Where some shades of colors can not be handled, they are simulated. This is true in our process as well.
In summary, from your original design, (scanned, photographed or originally developed with your computer), to our computer, to the printer, and lastly to the end product, there are several factors affecting the color that more than likely, you won't be able to get an exact color matching.
Removing Background.
Please be aware that removing backgrounds from an image is easy only in the movies. If the lines between the main object and the background is not clear, the harder the work becomes and the longer it takes. Results can not be guaranteed either. If you would like us to do remove/change the background of an image for you, we charge a service fee at the rate of $60 per hour.
The process of placing your custom orders.
After you email/send us your design, we will email you back a 'proof' of your design for approval. After which we will send you a PayPal invoice so you can pay for your purchase.
We make up your order as soon as we receive your check or order information. Turnaround time is within 24-72 hours, excluding weekends and holidays. We email you when we've shipped your order.
If you have questions or suggestions for us, please feel free to contact us.